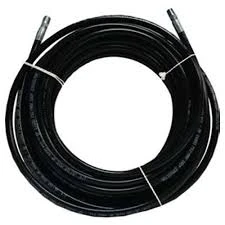
How to Disconnect the Power Steering Hose Safely and Effectively
Understanding the Removal of Power Steering Hose A Step-by-Step Guide
Power steering is a vital component of modern vehicles, providing drivers with enhanced control and ease of steering. However, like any part of a car's system, power steering hoses can wear out or develop leaks over time. In such cases, removing and replacing the power steering hose is a necessary task that can be tackled with the right tools and knowledge. This article serves as a comprehensive guide on how to effectively remove a power steering hose.
Tools and Materials Needed
Before embarking on the removal process, it’s crucial to gather the right tools and materials. Here’s a list of what you might need
1. Socket set and wrenches 2. Screwdrivers (flathead and Phillips) 3. Pliers 4. Power steering fluid 5. A drain pan 6. Replacement power steering hose 7. Safety gloves and goggles 8. Rags or paper towels for cleanup
Step-by-Step Removal Process
1. Safety First Begin by parking your vehicle on a level surface and ensuring the engine is off. Engage the parking brake, and if necessary, place wheel chocks behind the rear wheels for added safety. Wearing safety gloves and goggles will protect you from any fluid spills during the process.
2. Locate the Power Steering Hose Open the hood and locate the power steering system components. The power steering hose typically runs from the power steering pump to the steering rack. It's important to identify both the high-pressure and low-pressure hoses, as you may be removing one or both.
3. Relieve Pressure To prevent a spray of fluid when disconnecting the hoses, relieve the pressure in the power steering system. You can do this by turning the steering wheel from lock to lock several times with the engine off. This action helps in draining excess fluid from the system.
remove power steering hose

4. Drain the Fluid Using the drain pan, position it under the power steering reservoir. Remove the cap from the reservoir and allow the fluid to drain into the pan. This step helps minimize mess and waste during the hose removal.
5. Disconnect the Hose Start with the high-pressure hose, usually secured by a bolt or nut. Use the appropriate socket or wrench to loosen and remove it. Once the high-pressure hose is disconnected, move on to the return or low-pressure hose. This hose may be attached with a clamp, which you can loosen with pliers. After removing both hoses, let any remaining fluid drain into the pan.
6. Inspect and Replace With the hoses removed, inspect the fittings and connections for any signs of damage or corrosion. If your new power steering hose comes with O-rings or sealing washers, ensure you install them as per the manufacturer's instructions.
7. Install the New Hose Begin by attaching the new power steering hose into the correct position. Secure the high-pressure hose first, followed by the low-pressure hose, ensuring that they are tightly fitted to prevent leaks.
8. Refill Power Steering Fluid Once the hoses are secured, refill the power steering reservoir with the recommended type of fluid. Check your vehicle’s manual to ensure compatibility.
9. Bleed the System After refilling the fluid, it's essential to bleed the power steering system to remove any air trapped inside. Start the engine and turn the steering wheel from lock to lock several times, checking the fluid level and adding more as needed.
10. Final Check After ensuring there are no leaks and the fluid is at the correct level, close the hood and take the vehicle for a short test drive. Monitor for any unusual noises or steering issues.
Conclusion
Removing and replacing a power steering hose might seem daunting at first, but with the right tools, materials, and methodical approach, it can be accomplished successfully. Regular maintenance of the power steering system will not only enhance the driving experience but also prolong the lifespan of your vehicle's components. If you encounter any challenges during the process, don’t hesitate to consult with a professional mechanic to ensure everything is handled correctly.
-
Reliable Brake Line Solutions for Your VehicleNewsJun.05,2025
-
Quick Fix for Leaky Air Conditioning HosesNewsJun.05,2025
-
Powerful Sewer Jetting Solutions for Tough ClogsNewsJun.05,2025
-
Power Steering Hose Problems SolvedNewsJun.05,2025
-
Hose Protectors That Actually WorkNewsJun.05,2025
-
Essential Hose Connectors for Every HomeNewsJun.05,2025

