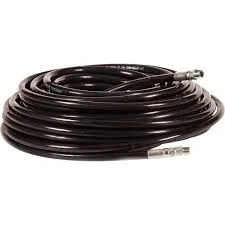
Steps for Fixing Power Steering Pressure Hose Issues Effectively
How to Repair a Power Steering Pressure Hose
Power steering is an essential component of modern vehicles, allowing for easier maneuverability and control. However, over time, the power steering pressure hose can develop leaks due to wear and tear, leading to poor steering performance and potential damage to the power steering system. If you suspect a problem with your power steering pressure hose, here's a step-by-step guide on how to repair it.
Step 1 Gather Your Tools and Materials
Before diving into the repair, make sure you have the following tools and materials ready - New power steering pressure hose - Wrenches and sockets (typically metric) - Screwdrivers - Pliers - Power steering fluid - Rags or shop towels - Safety goggles and gloves
Step 2 Identify the Problem
Before you start the repair process, it's crucial to confirm that the power steering pressure hose is indeed the issue. Signs of a failing hose include - A noticeable fluid leak around the hose - Difficulty in steering, especially at low speeds - A whining noise while turning the steering wheel
Once you've verified the problem, you can proceed with the repair.
Step 3 Prepare the Vehicle
Start by parking your vehicle on a flat surface and engage the parking brake. It’s also a good idea to disconnect the negative terminal of the battery to prevent any electrical issues while you work.
Step 4 Access the Hose
Locate the power steering pressure hose, typically found in the engine bay. The hose runs from the power steering pump to the steering gear. Depending on your vehicle's design, you may need to remove some components (like the air intake or engine covers) to access the hose easily.
Step 5 Remove the Old Hose
how to repair power steering pressure hose

Once you have clear access, use the appropriate wrenches to carefully disconnect the old power steering pressure hose from both the pump and the steering gear. Be prepared for fluid spillage; have some rags handy to clean up any spills. After removing the hose, inspect the fittings for any debris or damage.
Step 6 Install the New Hose
Take your new power steering pressure hose and compare it with the old one to ensure it is the correct length and configuration. Begin by connecting one end of the new hose to the power steering pump and tighten it securely, making sure not to overtighten and risk damaging the fitting. Next, route the hose to the steering gear and connect the other end, ensuring it follows the same path as the old hose to avoid kinks or pinching.
Step 7 Refill Power Steering Fluid
After securing the new hose, it’s time to refill the power steering fluid. Check your vehicle’s manual for the recommended type and quantity of fluid. Pour the fluid into the reservoir until it reaches the designated level.
Step 8 Bleed the System
Next, you will need to bleed the power steering system to remove any air pockets. Start the engine and turn the steering wheel from lock to lock several times while checking for leaks. Ensure you keep an eye on fluid levels and add more fluid as necessary.
Step 9 Check for Leaks and Test Drive
After bleeding the system, check all connections and fittings for leaks. If everything looks good, take the car for a test drive to ensure that the steering is functioning properly and that there are no lingering issues.
Conclusion
Repairing a power steering pressure hose is a manageable task for those with some mechanical knowledge and the right tools. Regular maintenance and inspections can help prevent future issues and prolong the lifespan of your power steering system. Always consult your vehicle’s manual for specific instructions tailored to your model. If you encounter any difficulties, don’t hesitate to consult a professional mechanic for assistance.
-
Ultimate Spiral Protection for Hoses & CablesNewsJun.26,2025
-
The Ultimate Quick-Connect Solutions for Every NeedNewsJun.26,2025
-
SAE J1401 Brake Hose: Reliable Choice for Safe BrakingNewsJun.26,2025
-
Reliable J2064 A/C Hoses for Real-World Cooling NeedsNewsJun.26,2025
-
Heavy-Duty Sewer Jetting Hoses Built to LastNewsJun.26,2025
-
Fix Power Steering Tube Leaks Fast – Durable & Affordable SolutionNewsJun.26,2025

