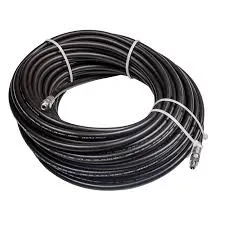
Steps for Disconnecting and Replacing Power Steering Hose Effectively
How to Remove Power Steering Hose A Step-by-Step Guide
Removing a power steering hose is a critical task that can be necessary for various repairs or replacements within your vehicle’s steering system. Whether the hose has developed a leak or is simply worn out, knowing how to remove it properly is essential to maintain your vehicle's performance. This guide will provide you with step-by-step instructions on how to safely and effectively remove a power steering hose.
Tools and Materials Needed
Before you begin the removal process, gather the following tools and materials
- Socket and wrench set - Screwdrivers (flathead and Phillips) - Pliers - Drain pan - New power steering hose (if replacing) - Power steering fluid - Shop towels or rags - Safety goggles and gloves
Step 1 Safety First
Before you start, ensure your vehicle is parked on a flat surface with the engine turned off. It is crucial to let the engine cool down if it has been running. Don your safety goggles and gloves to protect against any power steering fluid spills.
Step 2 Locate the Power Steering Hose
Open the hood and locate the power steering fluid reservoir. The power steering hose is usually connected to the pump and the steering gear. Depending on your vehicle, there may be two hoses a high-pressure and a low-pressure hose. Identify which one you need to remove.
Step 3 Prepare for Fluid Drainage
Place a drain pan under the power steering hose connection points to catch any fluid that may spill out during the removal process. This step is essential to prevent any mess and protect your vehicle’s components from power steering fluid.
Step 4 Disconnect the Hose
how to remove power steering hose

1. Loosen the Hose Clamps Most power steering hoses are secured with clamps. Use pliers or a screwdriver to loosen the clamps holding the hose in place. Ensure you are working on both ends of the hose (the pump side and the steering gear side).
2. Remove the Hose Once the clamps are loose, gently pull the hose off the connection points. You may need to twist it slightly to break the seal if it’s stuck. Be cautious, as fluid will begin to leak as you disconnect the hose.
Step 5 Clean Up
After successfully removing the hose, let any remaining fluid drain into the pan. Use shop towels to clean any spills around the connections. This will prevent dirt and debris from entering the system when you install the new hose.
Step 6 Inspect and Replace
Inspect the old hose for any signs of damage or wear. If you are replacing it, take this opportunity to clean the connection points thoroughly. When installing the new hose, ensure it fits snugly and check for any obstructions that could hinder its placement.
Step 7 Install the New Hose
1. Connect the New Hose Begin by fitting one end of the new power steering hose onto the power steering pump. Push it on until it’s fully seated. 2. Secure the Hose Once the hose is in place, fasten the hose clamp securely around it. Repeat this step on the other end of the hose connected to the steering gear. 3. Recheck Connections Go through all connections to ensure they are tight and secure.
Step 8 Refill Power Steering Fluid
After the installation, refill the power steering reservoir with the appropriate fluid as specified in your vehicle's manual. Start the engine and turn the steering wheel lock to lock a few times to help bleed the system of any air.
Conclusion
Removing and replacing a power steering hose may seem daunting, but with the right tools and steps, it can be completed easily. Always remember to follow safety precautions, properly dispose of any spilled fluid, and ensure all connections are secure before starting your vehicle. Regular maintenance of your power steering system can significantly enhance your driving experience and prolong the life of your vehicle’s components.
-
Ultimate Spiral Protection for Hoses & CablesNewsJun.26,2025
-
The Ultimate Quick-Connect Solutions for Every NeedNewsJun.26,2025
-
SAE J1401 Brake Hose: Reliable Choice for Safe BrakingNewsJun.26,2025
-
Reliable J2064 A/C Hoses for Real-World Cooling NeedsNewsJun.26,2025
-
Heavy-Duty Sewer Jetting Hoses Built to LastNewsJun.26,2025
-
Fix Power Steering Tube Leaks Fast – Durable & Affordable SolutionNewsJun.26,2025

