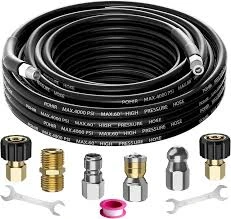
Car Air Conditioning Hose Repair Tips and Techniques for Optimal Performance
Car Air Conditioning Pipe Repair A Comprehensive Guide
When it comes to maintaining your vehicle, the air conditioning system is often overlooked. However, a functioning air conditioning (AC) system is essential for both comfort and safety, especially during hot summer months. One of the critical components of this system is the AC pipes, which can be susceptible to wear, damage, and leaks. Understanding how to diagnose and repair these pipes can save you both time and money.
Understanding the AC System
The air conditioning system in your car operates by circulating refrigerant through a closed loop of components, including the compressor, condenser, expansion valve, evaporator, and necessary piping. The AC pipes transport the refrigerant between these components. Over time, these pipes can deteriorate due to corrosion, road debris, or simply age, leading to leaks that can compromise the entire system's performance.
Identifying Symptoms of Pipe Issues
Before delving into repairs, it's essential to recognize the symptoms that suggest your AC pipes may be damaged
1. Reduced Cooling Performance If your car's air conditioning is not cooling as effectively as it used to, it may be due to a refrigerant leak in the pipes. 2. Visible Damage Inspect the AC pipes for any visible signs of damage, such as dents, cracks, or rust spots. 3. Hissing or Bubbling Noises Unusual sounds coming from the AC system may indicate escaping refrigerant through a leaky pipe. 4. Oil Stains Any oily residue on or around the pipes can signal a refrigerant leak, as the refrigerant can mix with the oil in the system.
Tools Needed for Repair
Before you start the repair process, make sure you have the following tools and materials on hand
- Pipe wrenches - Screwdrivers - Refrigerant recovery kit - AC pipe repair kits (available at auto parts stores) - Hose clamps - Safety goggles and gloves
car air con pipe repair

Step-by-Step Repair Process
1. Safety First Always ensure the vehicle is off and cool before beginning any repairs. Disconnect the battery to avoid any electrical issues.
2. Recover the Refrigerant Use a refrigerant recovery kit to safely remove the refrigerant from the AC system. This is a crucial step, as working on the AC system without properly recovering the refrigerant can be hazardous.
3. Remove the Damaged Pipe Once the refrigerant has been recovered, locate the damaged AC pipe. Use the appropriate tools to disconnect and remove it. Take care to note how it is connected, as you’ll need to attach the new pipe in the same way.
4. Install the New Pipe After removing the damaged pipe, take the new pipe from your AC pipe repair kit and install it in the same position. Make sure all connections are secure and use hose clamps to ensure a tight fit.
5. Recharge the AC System Once the new pipe is in place, you will need to recharge the AC system with the appropriate refrigerant. Follow the manufacturer’s guidelines for the correct type and amount of refrigerant.
6. Test the System After recharging, reconnect the battery and test the AC system. Turn on the air conditioning to ensure it is operating correctly and that there are no leaks.
Preventive Measures
While repairing AC pipes may seem daunting, regular maintenance can help prevent issues before they arise. Perform routine checks of your AC system, especially before summer, and have any signs of trouble addressed promptly. Regularly cleaning the condenser and ensuring that the system is properly charged can also prolong the life of your AC system.
In conclusion, understanding how to repair car air conditioning pipes can lead to a more comfortable driving experience. While DIY repairs can save you money, if you’re unsure about the process or encounter significant damage, don’t hesitate to consult a professional mechanic. Keeping your AC system in good shape ensures that you stay cool and comfortable on the road.
-
Ultimate Spiral Protection for Hoses & CablesNewsJun.26,2025
-
The Ultimate Quick-Connect Solutions for Every NeedNewsJun.26,2025
-
SAE J1401 Brake Hose: Reliable Choice for Safe BrakingNewsJun.26,2025
-
Reliable J2064 A/C Hoses for Real-World Cooling NeedsNewsJun.26,2025
-
Heavy-Duty Sewer Jetting Hoses Built to LastNewsJun.26,2025
-
Fix Power Steering Tube Leaks Fast – Durable & Affordable SolutionNewsJun.26,2025

