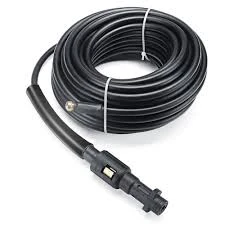
Air Conditioner Hose Replacement Steps for Improved Cooling Performance and Efficiency
A Comprehensive Guide to Air Conditioner Hose Replacement
Maintaining your vehicle's air conditioning system is essential for comfort, especially during the sweltering summer months. One of the critical components of this system is the AC hose, which transports refrigerant to and from the evaporator and condenser. Over time, these hoses can wear out, become damaged, or develop leaks, making their replacement necessary. In this article, we will discuss the importance of AC hose maintenance, the signs that indicate a replacement is needed, and how to replace the AC hose yourself.
Importance of AC Hose Maintenance
AC hoses are designed to withstand high pressure and extreme temperatures. However, they can suffer from wear and tear due to environmental factors such as heat, humidity, and road debris. Maintaining your AC system, including the hoses, is vital for efficient performance. A malfunctioning or damaged hose can lead to refrigerant leaks, reduced cooling efficiency, and potentially costly repairs if not addressed promptly.
Signs That Your AC Hose Needs Replacement
1. Visible Damage Inspect your hoses regularly. Look for any cracks, frays, kinks, or signs of wear. Any visible damage suggests that the hose's integrity is compromised and might need replacement.
2. Refrigerant Leaks If you notice puddles of refrigerant (often oily and may feel cold) underneath your vehicle, it could indicate a leak in the AC system. Leaking hoses are a common cause of such problems.
3. Decreased Cooling Performance If your AC isn't blowing cold air as it used to, it might be due to refrigerant escape through a damaged hose. A drop in cooling efficiency is a significant indicator that something is wrong.
4. Unusual Noises Hoses can create unusual noises when they are under pressure or if they are vibrating against other components. Pinging or hissing sounds can signal air or refrigerant escaping from a damaged hose.
Steps to Replace Your AC Hose
If you've determined that your AC hose requires replacement, you can attempt this DIY project with the right tools and precautions. Here’s a step-by-step guide
Tools Required
air conditioner hose replacement

- Safety goggles and gloves - Wrench set - Screwdrivers - Pliers - Vacuum pump and manifold gauge set - Replacement AC hose - Refrigerant
Procedure
1. Safety First Start by wearing safety goggles and gloves. Ensure the engine is off and the vehicle is cool.
2. Locate the AC Hose Open the hood and locate the AC hose that needs replacement. It usually connects the compressor to the condenser or evaporator.
3. Disconnect the Battery To prevent any electrical faults, disconnect the car battery.
4. Release Refrigerant Using a manifold gauge set, safely release the refrigerant from the AC system per local regulations. This is crucial to avoid environmental harm.
5. Remove the Old Hose Detach the hose by loosening the clamps or bolts using a wrench. Carefully pull off the damaged hose and set it aside.
6. Install the New Hose Position the new AC hose and secure it with the appropriate clamps or bolts. Make sure it fits snugly and is not pinched or kinked.
7. Recharge the AC System Once installed, reconnect the battery and use a vacuum pump to remove any air from the system. Then, refill the AC system with the proper amount of refrigerant.
8. Test Your AC Finally, turn on the engine and set the AC to maximum. Check for any leaks and monitor the cooling performance. Ensure that everything is functioning correctly.
Conclusion
Replacing your vehicle's AC hose may seem daunting, but with the right tools and a bit of patience, it's a manageable task. Regular maintenance and timely replacement of worn components will ensure your air conditioning system operates efficiently, keeping you cool and comfortable on the road. If you're unsure about any step in the process, consulting a professional mechanic is always a wise decision. Keeping your AC in top condition not only enhances your driving experience but also prolongs the life of the entire system.
-
Ultimate Spiral Protection for Hoses & CablesNewsJun.26,2025
-
The Ultimate Quick-Connect Solutions for Every NeedNewsJun.26,2025
-
SAE J1401 Brake Hose: Reliable Choice for Safe BrakingNewsJun.26,2025
-
Reliable J2064 A/C Hoses for Real-World Cooling NeedsNewsJun.26,2025
-
Heavy-Duty Sewer Jetting Hoses Built to LastNewsJun.26,2025
-
Fix Power Steering Tube Leaks Fast – Durable & Affordable SolutionNewsJun.26,2025

