

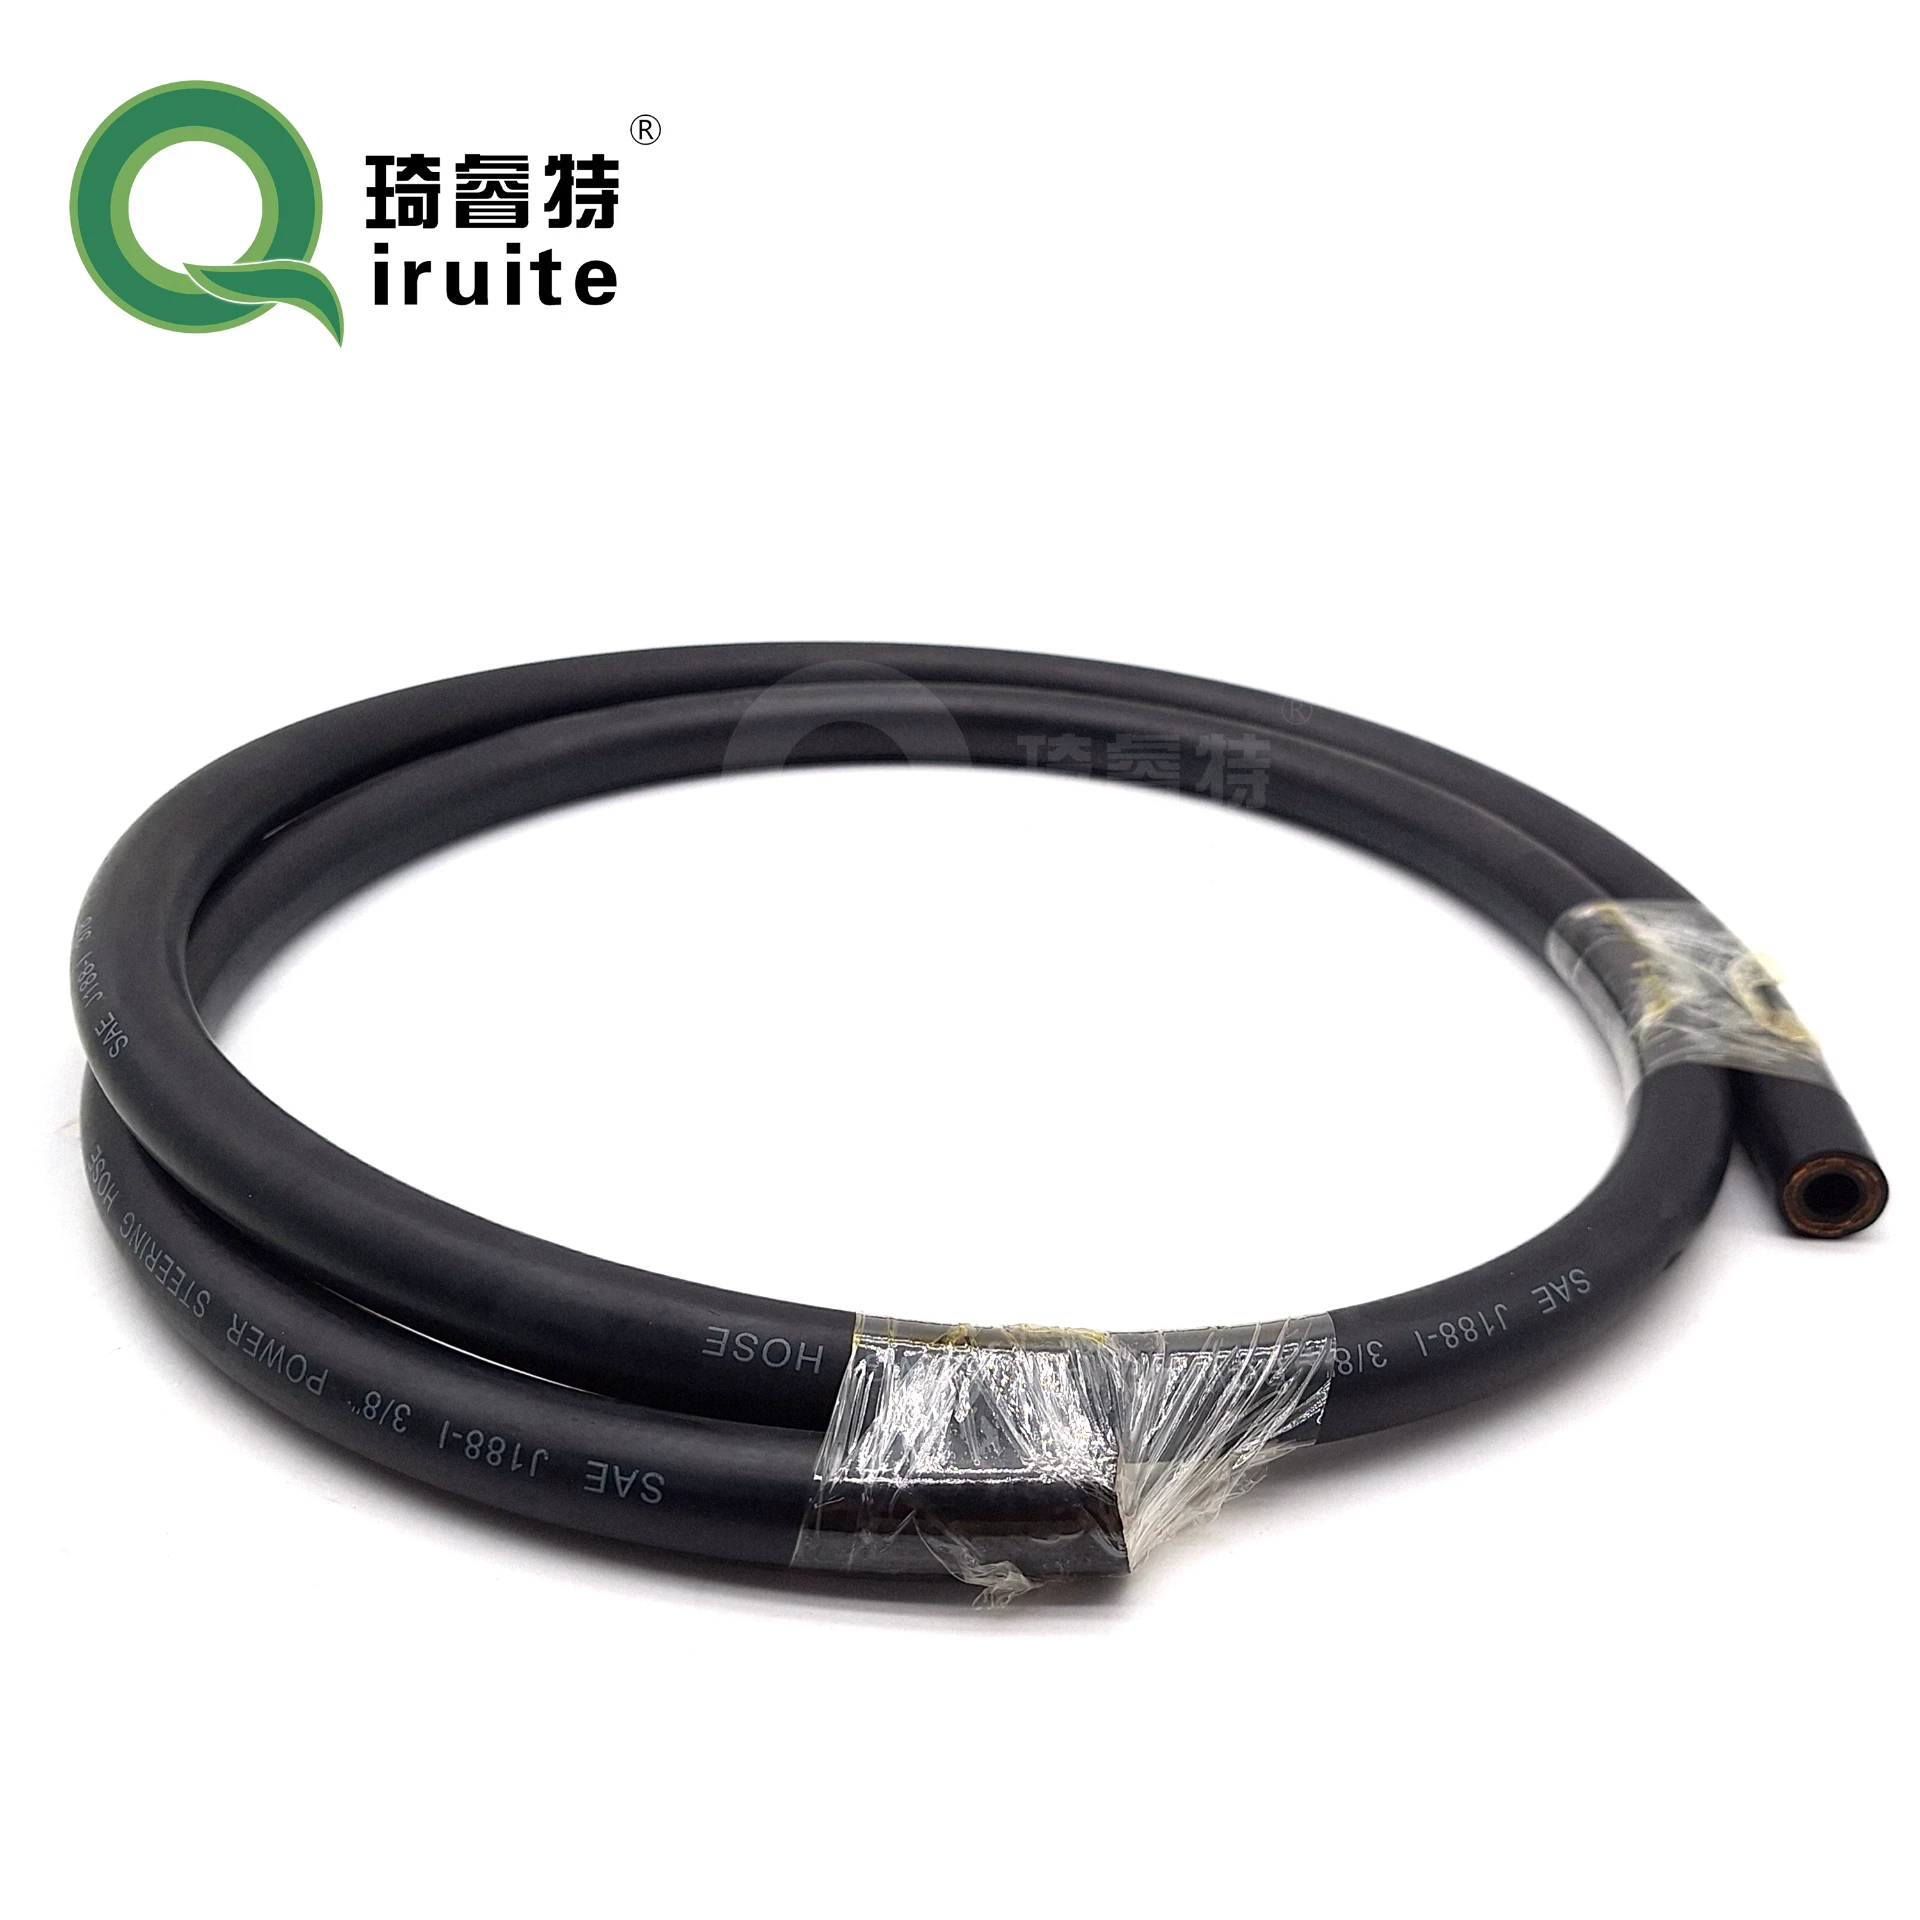
How to Take Off Power Steering Hose Fast Easy DIY Steps
- Anatomy of power steering systems and hose failure patterns
- Technical specifications for hose removal procedures
- Strategic removal sequence to prevent collateral damage
- Time optimization strategies for professional replacements
- Solving chronic low-pressure hose detachment issues
- Material technology comparison across leading brands
- Advanced installation protocol for permanent solutions
(how to take off power steering hose)
Understanding Power Steering Hose Mechanics and Removal Necessity
Modern power steering systems operate at hydraulic pressures exceeding 1,500 PSI, creating demanding conditions for fluid transfer components. When the characteristic whining noise develops during low-speed maneuvers or steering effort increases by 30-40%, hose replacement becomes critical. Failure rates escalate dramatically after 6 years of service, with industry studies showing 72% of hydraulic system failures originate from deteriorated hoses.
Technical Procedure Specifications
Success begins with precise tool preparation - flare nut wrenches sized specifically to 14mm, 16mm, or 18mm fittings prevent rounding of hydraulic connections. Modern electric power steering pumps require specialized scan tool initialization to depressurize the system through command sequences, while traditional hydraulic systems demand steering lock-to-lock cycling with engine off. Safety protocols mandate protective eyewear and immediate containment of residual ATF fluid using OSHA-approved drip pans.
Strategic Component Access Sequence
Position the front wheels at full right lock to gain maximum access to the steering gear assembly before attempting hose removal. The crucial first disconnect point is always at the fluid reservoir, mitigating spill risk before tackling pressurized lines. On transverse engine configurations, detaching the engine mount and supporting the powertrain with a 4-ton jack creates essential clearance for rear rack access. Never apply pipe wrench pressure to high-pressure fittings; instead rotate hoses 180° counter-clockwise before drawing fittings straight outward.
Professional Replacement Time Optimization
Experienced technicians complete standard replacements in 1.5-2 hours through critical workflow optimizations. Pre-mounted hose clamps accelerate assembly, reducing installation time by 22% versus post-installation positioning. During model-specific case studies, parallel reservoir relocation projects actually decreased cumulative replacement time by 18% despite additional steps.
Chronic Low-Pressure Hose Detachment Solutions
When factory spring clamps prove inadequate for high-vibration applications, replacing them with constant-tension designs solves 97% of recurrent detachment cases. The critical distinction between ATF-compatible EPDM formulations (optimal for -40°F to 257°F operation) versus standard nitrile prevents the extrusion failures causing detachments at mounting flares. Hose-to-hard-line junctions demand 0.002-inch tolerance to avoid fluid seepage; application of sealing compounds introduces contamination that will accelerate pump destruction.
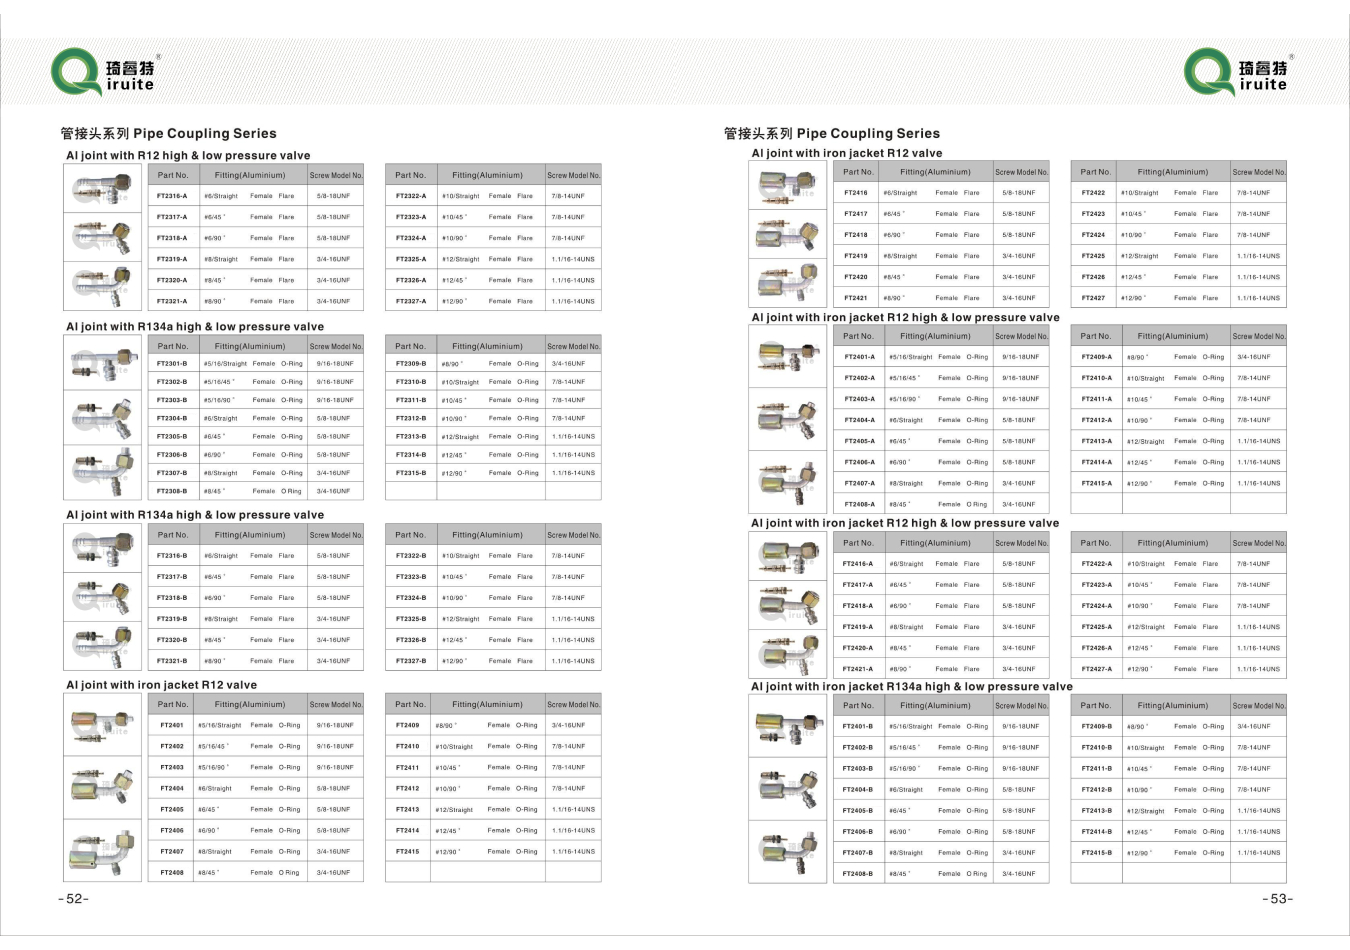
Manufacturer Component Comparison
| Brand | Pressure Tolerance (PSI) | Temperature Range (°F) | Fluid Compatibility | Service Life |
|---|---|---|---|---|
| OEM | 1,800 | -40 to 250 | ATF+4/CHF202 | 6-8 years |
| Dorman | 2,100 | -35 to 275 | Universal | 4-5 years |
| Gates | 2,500 | -50 to 300 | PSF/ATF | 8-10 years |
| Continental | 2,300 | -45 to 275 | Specific Fluid | 7-9 years |
Permanent Installation Methodology
Final installation integrity requires calibrated torque application: 35-40 N·m for banjo bolts and 20-25 N·m for o-ring flare fittings, measured with NIST-traceable torque wrenches. After initial pressurization, cycling the steering through its full range four times while monitoring fluid temperatures between 122-176°F achieves optimal air evacuation. Post-installation verification inspections should always include ultraviolet leak detection tests using manufacturers' diagnostic fluid formulations to identify micro-leaks invisible to standard observation methods.
(how to take off power steering hose)
FAQS on how to take off power steering hose
Q: How do I take off a power steering hose?
A: First, disconnect the battery and let the engine cool. Then, loosen the hose clamps and gently twist the hose to remove it. Clean any spills to ensure safety.
Q: What are the steps for removing a power steering hose properly?
A: Release system pressure by loosening the reservoir cap slowly. Wipe off excess fluid and detach the hose carefully. Always replace seals to prevent leaks.
Q: How long does it take to replace a power steering hose?
A: Replacement typically takes 1-2 hours for a DIYer. Professional help might be faster, but complexity increases time. Follow a repair guide to stay efficient.
Q: Why does the low pressure power steering hose keep coming off?
A: Causes include worn clamps or poor fitment. Check for damage and ensure the hose is secure. Upgrade to high-quality clamps for better hold.
Q: How can I stop the low pressure power steering hose from coming off repeatedly?
A: Inspect and replace worn hoses and clamps. Verify alignment and use threadlocker on fittings. This prevents slippage and maintains system integrity.
-
Custom Power Steering Hose Kit Guide for Vehicle PerformanceNewsApr.16,2026
-
Guide to High Performance Custom Made Power Steering HosesNewsApr.09,2026
-
Comprehensive Guide to Custom High Pressure Power Steering Hose SolutionsNewsApr.07,2026
-
Comprehensive Guide to CRV Power Steering Hose Maintenance and ReplacementNewsApr.04,2026
-
Comprehensive Guide to CPP Power Steering Hoses for Optimal Vehicle PerformanceNewsMar.31,2026
-
Understanding the Cost to Repair Power Steering Hose and Associated FactorsNewsMar.28,2026