r134a recharge hose and gauge
Understanding R134a Recharge Hoses and Gauges Essential for HVAC Technicians
R134a, or tetrafluoroethane, is a refrigerant commonly used in automotive air conditioning systems and various HVAC applications. As older R12 refrigerants are phased out due to environmental concerns, R134a has been the go-to substitute for many technicians. Properly recharging these systems requires the right tools, especially a recharge hose and gauge set.
What is a Recharge Hose?
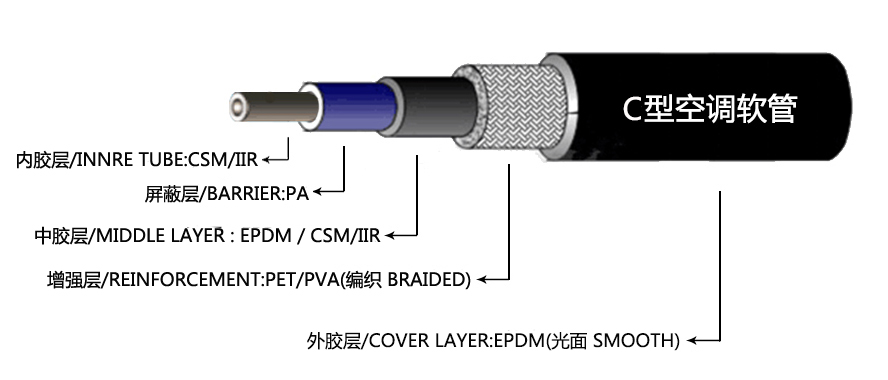
A recharge hose is a flexible tube designed to connect the refrigerant canister to the vehicle's air conditioning system. These hoses come in different lengths and sizes and are built to withstand high pressures. Typically, they are equipped with quick-connect fittings to facilitate easy connection to the service ports of an AC system.
Recharge hoses are usually color-coded blue for the low-pressure side and red for the high-pressure side. This distinction helps technicians quickly identify the correct side to connect when adding refrigerant. Additionally, the hoses often feature a safety valve that prevents the refrigerant from escaping when the connection is broken.
The Importance of the Gauge
One of the critical components of a recharge hose assembly is the gauge. The gauge serves as an indicator of the pressure within the AC system, helping technicians determine whether the system is correctly charged. Typically, the gauge set will include both a low-pressure gauge (often marked in blue) and a high-pressure gauge (marked in red).
The low-pressure gauge shows the pressure on the evaporator side of the system, while the high-pressure gauge reflects the pressure on the condenser side. By understanding the readings on these gauges, technicians can diagnose potential issues. For instance, if the low-pressure gauge reads too low, it could indicate a refrigerant leak or a blockage in the system.
Steps for Using a Recharge Hose and Gauge
Using a recharge hose and gauge set properly involves several steps
r134a recharge hose and gauge

1. Prepare the Vehicle Start with the vehicle off and set to a cool environment. Ensure your AC system is empty or requires recharging.
2. Identify Service Ports Locate the low-pressure service port (usually larger and located on the suction line) and the high-pressure service port on the vehicle’s AC system.
3. Connect the Hoses Attach the blue (low-pressure) hose to the low-pressure port and the red (high-pressure) hose to the high-pressure port. Ensure the connections are secure.
4. Check the Gauges Start the vehicle and turn the AC on to the highest setting. Observe both gauge readings. The low-pressure gauge should generally indicate between 25-45 psi while the high-pressure gauge should be around 200-250 psi, depending on ambient temperatures and vehicle specifications.
5. Recharge the System If the pressures indicate a low refrigerant level, attach the refrigerant can to the blue hose. Open the valve to allow refrigerant to flow into the system while keeping an eye on the gauge.
6. Monitor Pressure Balance the recharge based on the gauge readings, ensuring you do not overcharge the system.
7. Disconnect and Test Once the desired pressure level is reached, turn off the refrigerant flow, disconnect the hoses, and run the AC system to check for cool air.
Conclusion
Using R134a recharge hoses and gauges is a vital skill for HVAC technicians and automotive service professionals. Proper handling of these tools not only ensures effective air conditioning performance but also minimizes the risk of environmental harm. As vehicles continue to evolve and refrigerants grow more complex, understanding the operation and proper use of recharge hoses and gauges will remain an essential aspect of maintaining HVAC systems. Keeping these systems running efficiently can lead to increased comfort and reduced fuel consumption for vehicle owners.
-
Understanding Power Steering Tube ReplacementNewsApr.16,2025
-
SAE J1401 Brake Hoses: A Critical Component for Vehicle SafetyNewsApr.16,2025
-
Pipe Couplings: Essential Components for Effective Plumbing and Fluid SystemsNewsApr.16,2025
-
Hose Guard Solutions for Every NeedNewsApr.16,2025
-
Effective Spiral Protection SolutionsNewsApr.16,2025
-
Effective Sewer Cleaning SolutionsNewsApr.16,2025

